DIY: B2S Teacher Gift

DIY: Back to School Teacher Gift

http://cobornsblog.com/category/blog/crafty-creations/

Lynell

It’s almost Back-To-School time and whether your child is entering their first year of school or their last, it is always an exciting season full of new beginnings, fun transitions and lots of new things to learn and experience. Continue reading

Festive Easter Egg Tree

http://cobornsblog.com/category/blog/crafty-creations/

Lynell

It’s mid-March, with no snow, abundant sunshine and warm days- It’s giving me spring fever and before we know it Easter will be right around the corner! I love Easter because my entire family, grandkids and all my loved ones are together.

If you know me, you know I love decorating for every season. Easter is no exception and I truly enjoy decking out my home- inside and out- with festive spring decor. This Festive Easter Egg Tree served dual purpose for me this holiday season. I loved that it was an adorable centerpiece. I received tons of compliments on it from my coworkers when I brought it into work to take photos, and I can’t wait to see how much my grandkids enjoy it! It also was a great treat container. Each of these Easter Eggs contain goodies for my guests in it and I can’t wait to watch the kids faces light up when they get to pick some eggs of their very own. Similarly to a Christmas Tree, this Easter Tree made a great place to store the extra “gifts” of candies, Peeps and jelly beans that I had leftover. Add a touch of faux-grass and you just can’t beat this adorable crafty creation.

Check out the list below to see what I used to make this craft!

  1. A variety of smooth and rough tree branches
  2. White paint to cover the branches along with a paintbrush
  3. Plastic Easter eggs
  4. Fake Easter basket grass- I picked green, but you can pick any color!
  5. 1 large mason jar
  6. Bulk candies/sweet treats from the Easter aisle 
  7. Ribbons from local craft store to decorate the outside of the jar as well as hang the egg ornaments from the tree branches
  8. Optional: If you are making a smaller version of this craft and want to stick some styrofoam at the bottom of the mason jar it can help your branches stay situated easier.

As you can see there isn’t too long of a list to make this craft- which makes it great for a last minute decoration. Check out how I made this craft below!

  • First, I collected tree branches from outside. This was an easy task because there was hardly any snow in my yard! It was also fun to do with my grandkids.
  • Next, I painted the branches. The smooth branches took on the paint much better than the rough branches did, but I really liked the look of the rough ones so I still used both when I made my tree.
  • I tied a ribbon around my large mason jar. If you are like me and reuse mason jars tying it should be just fine, but if you want it to be extra secure add a touch of hot glue to hold the ribbon in place.
  • Fill your plastic Easter eggs with a few candies each. Don’t add too many or it may make the branches bend from the extra weight.
  • Secure the eggs with a few drops of glue on each side of a looped ribbon. Be sure not to glue over the seal that splits the egg in half or you won’t be able to get the candies out!
  • Decorate the Easter tree similarly to how you would decorate a Christmas tree! My tree had almost 20 eggs on it, but I could have added more if I wanted on the extra branches.

Now just toss some candies underneath the tree on Easter morning and enjoy the beauty of your crafty creation! I hope you enjoy this simple blog and you use it to add a little spring fever into your next few weeks leading up to Easter!

Lynell
Coborn’s, Inc. Graphic Designer

Salad On A Stick

Lynell

If you know me well you know I am a creative and artistic person… When deciding on a blog topic I thought, “Why not let that creativity shine through with the foods I create?” This food art is titled; “Salad On A Stick” and I just love how great they turned out! My coworkers would agree, as they were completely gone shortly after setting them out to eat at the office.

The first secret to a really great Salad On A Stick is to have foods with lots of color and great variety for guests to pick and choose from. The second secret is to have salad dressings that everyone will love! Wishbone has my favorite dressings and their great flavor can really spruce up a salad! I picked all of my favorites to set out when I made these for my coworkers to try. My favorite flavors are Italian, Western, Ranch and of course I had to include the Raspberry Walnut Vinaigrette. If you want to take your salad from okay to outstanding then pick up these delicious dressings from Wishbone to try. Believe me when I say your guests will thank you.

These appetizers are as easy to make as 1, 2, 3.

  1. First pick up your fixins’, dressings and kabob sticks. I purchased blocks of cheese, a variety of meat, hard-boiled eggs, cucumbers, olives, tomatoes and a head of lettuce to break up.
  2. Then cut up your food into cubes or bite size pieces. This will make them easier to eat and less messy for your guests.
  3. Finally prepare them in an eye appealing fashion on the kabob stick. If you’re looking for a more do-it-yourself concept you could make a kabob bar! Simply set the sticks at the beginning of the line, the cubed food in the middle and the Wishbone dressing at the end. Guests will marvel at your creativity and appreciate the opportunity to add their favorite items to their Salad On A Stick.

Salads On A Stick are great for a multitude of events. From barbeques, graduation parties, picnics, potlucks, dinner on the patio, or even as a side for a Bloody Mary bar they are the perfect appetizers and I promise everyone will love them and you’ll love how quick and easy they are to prep for.

The next time snow is in the forecast or the winter weather is getting you down, just remember this blog and be optimistic that soon spring and summer will be here and you’ll have a delicious appetizer to bring to all of your warm weather events!

I hope this crafty creation can bring some inspiration to your life! Be sure to check out the rest of my blog with the link below!

Lynell
Coborn’s, Inc. Graphic Designer

6 Quick and Easy Salads in a Jar

Quick and Easy Salads in a Jar

http://cobornsblog.com/category/blog/crafty-creations/

Lynell

This fall the Coborn’s Support Center moved to a brand new building. The building, my workspace and the entire campus are absolutely beautiful and it creates a wonderful atmosphere to work at, but unfortunately I have to drive a little farther for my daily commute. With busy mornings where you are trying to get up and go quickly, I needed something that makes planning out lunches a little bit easier.

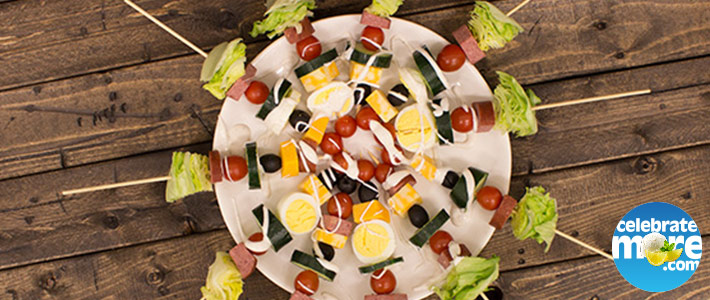
I suppose the easiest lunchtime solution is to go out to eat, which I’ll admit is nice occasionally, but it can be pricey to do everyday Kraft-Dressingand not always healthy for you. That’s why I’ve collected some delicious recipes to share with you all that I promise will spruce up any boring lunch routine!

Food Prep Freshness

Glass mason jars help to keep the salads very fresh, and by using wide mouth  jars I have created delicious salads that are perfect for anyone on the go or looking for a healthy and fun way to get their greens in- no salad bowl necessary. My mason jars were even chalkboard jars I picked up from a craft store for added lunchtime creativity!

Everything on my Facebook homepage lately seems to feature food recipes, clean eating blogs and meal prepping ideas. What better way to follow suit than to make my complete week of salads on Sunday evening and have them ready to go for the entire week.

I love the taste, freshness and most of all the convenience of these Mason Jar Salads. Best of all you can make so many different varieties, which means lunchtime doesn’t need to be boring, it can be as original as each day of the week!

Check out some of the recipes for these Mason Jar Salads below:

Dietitian’s Choice Salad

Dietitian's Choice Salad


Dietitian’s Choice Salad
 
Ingredients
  • 2 T. Kraft Balsamic Vinaigrette
  • 4-6 Baby Carrots, chopped
  • 1/4 Cup Peas
  • 1/4 Cup Peppers, chopped
  • 1/4 Cup Garbonzo Beans
  • 1/4 Cup Reduced Fat Feta Cheese
  • 1/2 Cup Tomato, chopped
  • 2 Cups Spring Mix Salad Greens with Kale
Instructions
  1. Wash Jar.
  2. In the same order that is listed above add your ingredients to a wide mouthed mason jar.
  3. Shake jar when ready to be eaten and refrigerate if you are saving it for a later date.
 
Notes
[b]Dietitian’s Notes:[/b][br]-This salad is great because the wide variety of vegetables are full of fiber, vitamins and minerals. [br]-Add dried cranberries to your salad to represent as many food groups as possible, but make sure no sugar is added![br]-Make sure you always have beans or some sort of protein added to your meals, and if a salad is your full meal make extra sure they are added![br]-Olive Oil and Balsamic Vinegar add a great flavor and provide healthy fats.[br]-Aside from the Feta Cheese (19) and the Balsamic Vinegar (18) all of these ingredients have a 100 on the NuVal Scoring System!


BLT Avocado Salad

BLT Avocado Salad


BLT Avocado Salad
 
Ingredients
  • 2 T. Kraft Bleu Cheese
  • 1/2 Cup Tomatoes, chopped
  • 1 Avocado, chopped
  • 6 Bacon Slices, cooked and chopped
  • 2 Cups Lettuce or Spinach Mix
Instructions
  1. Wash Mason Jar.
  2. Add ingredients in the order listed above.
  3. Keep refrigerated until ready to eat.
  4. Shake jar, add chips and enjoy!


Greek Salad

Greek Salad


Greek Salad
 
Ingredients
  • 2 T. Kraft Red Wine Vinaigrette Dressing
  • 1/2 Cup Cucumber, chopped
  • 1/2 Cup Tomatoes, chopped
  • 2 T. Red Onion
  • 4 Oz. Skinless Chicken Breast, cooked and chopped
  • 2 T. Reduced Fat Crumbled Feta Cheese
  • 1 T. Black Olives, chopped
  • 2 Cups Romaine Lettuce, chopped
Instructions
  1. Wash Mason Jar.
  2. Layer jar with dressing, cucumbers, tomatoes and onions.
  3. Add in chicken, feta cheese and olives.
  4. Top with lettuce.
  5. Refrigerate until ready to eat.
  6. When ready to eat shake jar.


Mom’s Salad

Mom's Salad Jar


Mom’s Salad
 
Ingredients
  • 2 T. Kraft Bleu Cheese Dressing
  • 4-6 Baby Carrots, chopped
  • 1/4 Cup Cauliflower, chopped
  • 2 Oz. Bacon Real Bites
  • 2 Cups Romaine Lettuce
Instructions
  1. Wash Mason Jar.
  2. Add ingredients in the order as listed above.
  3. When ready to eat shake jar and enjoy.
  4. Be sure to refrigerate if salad is going to be eaten at a later date.


Taco Salad

Taco Salad Jar


Taco Salad
 
Ingredients
  • 2 T. Kraft Classic Catalina Dressing
  • 1 T. Salsa
  • 2 T. Sour Cream
  • 1/4 Cup Taco Meat
  • 1/2 Cup Tomatoes, chopped
  • 1/4 Cup Kidney Beans
  • 1/8 Cup Shredded Cheddar Cheese
  • 1/2 Cup Tortilla Chips, crushed
  • 2 Lettuce, shredded
Instructions
  1. Wash Jar.
  2. Add ingredients in same order as listed above.
  3. Refrigerate until ready to eat.
  4. When ready to eat shake jar.


Strawberry Poppyseed Salad

Strawberry Poppyseed Salad


Strawberry Poppyseed Salad
 
Ingredients
  • 2 T. Kraft Creamy Poppyseed Dressing
  • 1/2 Cup Strawberries, sliced
  • 1/4 Cup Blueberries
  • 1/4 Cup Almonds
  • 2 Cups Romaine and Spinach to Brim of Jar
Instructions
  1. Wash Jar.
  2. Wash produce.
  3. Add ingredients in order to above and keep refrigerated.
  4. When ready to eat shake jar and enjoy.
 
Notes
Additional optional topping:[br]Mandrain Oranges


Tips & Tricks

The number one most important rule to remember when making these salads is to always keep the dressing at the bottom and the salad greens at the top of the jar. Keep the two layers as far away from one another as possible by having them separated with your hard veggies, protein and soft veggies. If you do that, your greens will stay crispy and fresh with no problems.

Follow this Layer List:

  •  Layer 1 (Bottom of Jar): 2-4 T. Dressing of Choice
  • Layer 2: Hard Veggies- This is where you add in carrots, bell peppers, celery, cucumbers, broccoli, cauliflower, etc.
  • Layer 3: Protein- This is where you will add the cheese, meats, beans, hard-boiled eggs, etc.
  • Layer 4: Soft Veggies- In this section you will add tomatoes, onions, corn, avocado, etc.
  • Layer 5 (Top of Jar): Greens to the Brim- Add in your lettuce and/or spinach.

Try to keep the ratio of each jar about half-and-half. That means half of the jar holds the toppings, dressing, grains, proteins and half of the jar holds the greens.

As I mentioned I like to make several of these jars on Sunday evening so I’m prepared for speedy grab and go lunches later on in the week. Luckily these salads last a week in the refrigerator!

Because these jars are so full to the brim you might have to eat off a layer or two of greens (yum!), then replace the lid, shake the heck out of it to distribute the dressing, and then dig right in with a fork.

Hope you enjoy my creations and they make meal planning a success!

Lynell
Coborn’s, Inc. Graphic Designer

Click Here for more articles by Lynell

www.cobornsblog.com - Crafty Creations by Lynell